document.addEventListener( 'wpcf7mailsent', function( event ) { ga( 'send', 'event', 'Contact Form', 'submit' ); }, false );
  • Phone: (714) 444-3004
  • Email us: info@kitchenandflooring.com
  • Working Days: Mon - Sat

Stone

Up to the minute knowledge about stone

No floor covering is older than natural stone, more beautiful or more earthy. Natural stone was ancient man and woman’s design element, a primary material of construction and an original medium of creativity.
We know stone and understand well its features, advantages and benefits. We know how it is created and how to integrate it into your home and lifestyle.

Main Street Kitchen & Flooring - Stone

Now, We want you to know.

We want you to know all about natural stone, to understand, learn and experience this historic and versatile product so you can decide if it’s the smartest flooring choice for you.

Why design with natural stone?

Well, for a number of reasons. Natural stone is strong and stable to live with. It exudes a rich, organic, beautiful surface and has a confident, timeless “presence” in any room.

Rub your hand across any natural stone product. Can you feel the eons of time it took to produce this natural wonder of Mother Earth?

It’s a fact. The formative process for natural stone began millions of years ago, deep beneath the surface of the earth.

A combination of heat and pressure created blocks of natural stone, including granite, marble, travertine, limestone, and slate.

As the earth’s crust began to grow and erode, it pushed minerals up from its core, forming massive rock deposits, which we refer to as “quarries”.

Walk across a natural stone floor and tread on the same material quarried and constructed by ancient people of nobility and notoriety.

From ancient monuments like the pyramids in Egypt and the majestic Greek and Roman temples, to the great civilizations of India and China, natural stone has been an important part of architecture throughout history.

It is the world’s oldest building material — imagine its beauty and elegance in your new home.

How old? In 2500 B.C., Djoser’s Step Pyramid in Egypt, the first structure to be made entirely of natural stone, was constructed using huge blocks of granite and limestone.

Today, natural stone quarries are found in many countries throughout the world such as Italy, China, Spain, India, Canada, Mexico and also here in the United States.

Recent advances in the stone industry’s equipment technology have greatly impacted the process of extracting stone from the quarry and installing it in a home.

Modern tools can accomplish this with such speed and efficiency that now natural stone is accessible to all and is beloved for its durability, personality and aesthetics.

Indeed, nothing compares to the beauty of natural stone, and nothing can create pride quicker than when you walk into your home and onto a natural stone floor.

And while it is typically more expensive than ceramic tile, natural stone will virtually always increase your home’s resale value. That’s important to know when shopping.

Today, there is a large selection of natural stone to choose from, and we will be showing you and explaining about each stone family in detail.

In these sections on Natural Stone you can count on learning about granite, the hardest and densest stone, marble, known for its rich, luxurious quality, limestone, a softer, more porous stone, and the popular travertine.

We will also take an informative look at slate and tumbled stone, America’s favorites in rustic settings.

As a side note, you should be aware of a product called Manufactured Stone. (Also called Agglomerate Stone.) It’s a synthetic stone product that can be used for flooring and you can learn more about it in the How It’s Made section.

We invite you to discover the many wonderful facets of Natural Stone and see if it is the right flooring for you.

We Are Here to Answer Tough Questions

Call us today or visit our convenient showroom that’s Open 6 Days a Week – Monday Through Saturday. Our In-store specialists have been through hours of training to educate our customers, answer tough questions, and provide the best customer service possible. We will show you why we deserve to earn your business!Come visit our Laminate Flooring Showroom in Santa Ana located near:

  • Anaheim Hills
  • Laguna Hills
  • Mission Viejo
  • Newport Beach


Shop smarter with this knowledge about natural stone styles.

Just like snowflakes, stars and people, no two natural stone floors are the same. Each floor will exhibit its own unique coloring, veining and natural characteristics such as hardness and porosity.

Each has it’s own style. A one-of-a-kind presence and personality.

If you’re shopping for flooring that is exciting and exclusive, beautiful and individual, natural stone is a natural choice.

However, it can also be a difficult choice because of the multitude of types, styles and finishes.

With a lot of information here and a little imagination on your part, you can begin to see what type of natural stone best represents your style.

First, remember that in general, natural stone floor tile sizes are 12”x12”, 13”x13”, 16”x16”, and 18”x18 and larger.” Natural stone is also available in mosaics which are comprised of pieces 3” or smaller and are often attached to a mesh backing.

Next, you should be aware that there are two types of edges for natural stone floor tile: a polished bull nose edge that has a rounded or curved appearance, or a polished straight 90 degree edge that gives a more modern and clean look to your space.

To help you understand the types of natural stone, we’ve put this glossary together.

There are two basic types of stone used in the building industry:

Natural stone such as marble, granite, or limestone.
Agglomerates (Manufactured stones) that consist of natural stone chips suspended in a bonding, manufactured material.

Natural stone can be grouped into three classes.
Igneous rock is formed when molten rock (called lava or magma) cools and hardens. Granite is an example of an igneous rock.

Sedimentary rock is formed from biological deposits that have undergone consolidation and crystallization. Limestone and sandstone fall into this category.

Metamorphic rock is created when other kinds of rocks are changed by great heat and pressure inside the earth. Marble, slate and quartzite are examples of metamorphic rocks.

Here are the names and definitions of some of the more popular natural stones:

Granite is an igneous stone that is extremely hard, dense and resistant to scratches and acid etching. It is an ideal stone for use in flooring and in food preparation areas. Hundreds of varieties of granite exist.

Sandstone is a sedimentary stone that is primarily composed of loose grains of quartz sand that are rough in texture. A number of varieties are available.

Limestone is another sedimentary stone, it’s formed from calcite and sediment and comes in many earthen colors.

Marble is a derivative of limestone. It is a metamorphic stone that can be polished. Marble is characteristically soft and easily scratched or etched by acids. There are countless types of marble from around the world.

Travertine is a crystallized, partially metamorphosed limestone, which because of its structure, can be filled and honed and is dense enough to be a type of marble.

Slate is a metamorphic stone that has a sheet-like structure. It is composed of clay, quartz and shale, and comes in a multitude of colors including reds and greens.

Agglomerate Stone is a manufactured stone made from natural stone chips suspended in a binder such as cement, epoxy resins or polyester.

The most well known agglomerated stone is poured-in-place terrazzo, used in building for thousands of years.

Today, some of the most popular manufactured stone products are quartz products.

These products offer the look of natural stone but are stain and scratch resistant, offer consistency and strength, and are virtually maintenance free.

Now, let’s take an even closer look at some of the most popular natural stone types available today, and provide you with some recommended applications.

Marble
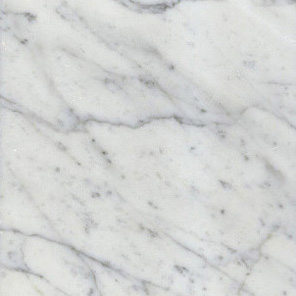
For pure elegance, marble is the choice. Marble has a legendary elegance. It was used throughout the ancient world because it was soft enough to be worked with tools but hard enough to last through the ages. Once considered the domain of the rich and famous, marble can be used in many applications throughout your home. Just what is marble you may ask? It’s a crystallized limestone that is not as hard as granite. Marble comes in many different color variations and usually displays a prominent veining pattern with luxurious swirls and patches of contrasting color that make marble famous. Sophisticated grays and whites to a wide range of earth tones in both light and dark colors are the most popular.

Granite

For durability, granite can take the hard knocks.
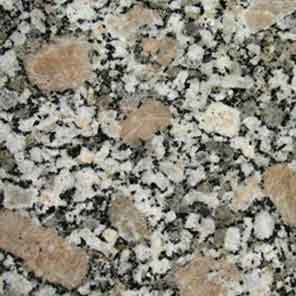
Of all natural stone, granite is one of the hardest and densest, second only to diamond. Made up mostly of quartz and feldspar, it resists staining and scratching better than any other natural stone, making it an ideal choice for your kitchen. In fact, granite is durable enough for almost any application you can think of. It’s beautiful in foyers, bathrooms, libraries, or as an accent with other natural stones. Mother Nature produces granite in a variety of colors such as rich browns, vibrant golds, warm creams and cooler blues, greens, grays and decadent black.

Limestone
Coral, character and color come home with limestone.
Limestone has a more subtle, casual look and is actually a “young” marble.
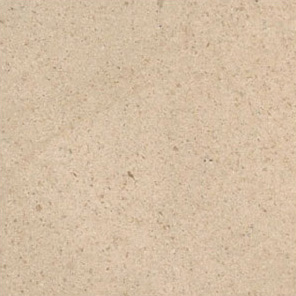
It is created by the accumulation of organic materials such as shells and coral that gives it a unique, natural look. This more porous stone comes in a diverse range of neutral colors from ivory to soft grays to golden browns. This range of colors makes limestone a versatile design option for flooring and walls.

Travertine
There’s a “hole” lot to know about Travertine.
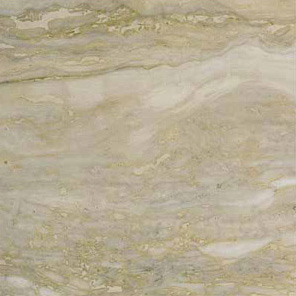
A member of the limestone family, Travertine shares some similar characteristics such as being soft and porous. Travertine is formed with many small cavities and holes that can be filled in with cement or resin, or left unfilled for a textured surface. The surface is then polished creating a different looks from honed to highly polished. The filled-in areas remain dull which creates an interesting contrast Travertine can also be tumbled for a rustic, old world look. Travertine can be used in flooring in numerous rooms in your home and can also make for a wonderful backsplash. Again, the colors are generally earthy and warm and are at home in both warm and cool environments.

Slate
Slate: intriguing indoors, outstanding outdoors.
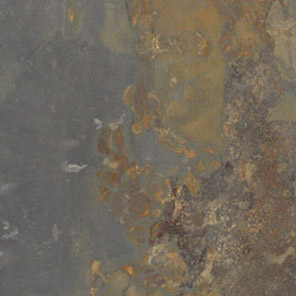
Slate is a highly versatile stone that gives a natural, rustic and colorful appearance to any room. Slate can be used for interiors as well as exteriors, making it the perfect product to bring the outdoors inside your home. All slate has a natural “clefting” along the surface that gives this stone its unique textural, layered look but is also available with a smooth surface. This stone is made up of clay and shale, which is very dense. Slate is water resistant, which also makes it ideal for exterior applications, such as patios and pool surrounds. Slate colors range from rich reds, oranges and golds to mauve, lavender, green, blue, black, rust and brown. If your style is about texture, no other natural stone has the dramatic texture and color of slate.

Don’t finish without learning about finishes.
All natural stone is fabricated with a particular type of surface finish.
Some common types of surface finishes we see today are: polished, honed, acid-washed, saw-cut refined, flamed, split-faced, tumbled and brushed. A polished surface creates a beautiful glossy shine from the natural reflection of the stone’s crystals. The mirror-like shine is accomplished by using progressively finer polishing heads during the polishing process, similar to the way that sandpaper smoothes hardwood furniture. The finer the sandpaper, the smoother the surface. The polish may last a long time or may be unstable depending on the type of stone.
Granite, marble and limestone are frequently polished, and require varying degrees of maintenance to preserve the shine.
A honed surface provides a flat, matte or satin finish creating a more informal and softer look. This finish is created by stopping short of the last stage of polishing. A honed finish shows fewer scratches, and requires very little maintenance. Marble, limestone, and slate would be your best choices for a honed finish. An acid-washed finish is shiny with small etching marks (pits in the surface). This finish shows fewer scratches and is much more rustic in appearance than a honed finish. Most stones can be acid-washed but the most common are marble and limestone. Acid washing is also a way to soften the shine on granite. Saw-cut refined offers you a matte finish. After initial cutting, the stone is processed to remove the heaviest saw marks but not enough to achieve a honed finish. A flamed finish is achieved by heating the surface of the stone to extreme temperatures, followed by rapid cooling.
The surface of the stone pops and chips leaving a rough, unrefined texture.
This process is usually done with granite. Flamed granite has a highly textured surface, making it ideal for areas where slip resistance might be a concern. Like in your shower areas. Split-faced gives you a rough texture, but one not as abrasive as flamed. This finish is typically achieved by hand cutting and chiseling at the quarry, exposing the natural cleft of the stone. This finish is primarily done on slate.
Tumbled delivers a smooth or slightly pitted surface, and broken, rounded edges and corners. There are several methods used to achieve the tumbled look.
3/8” thick tiles can be tumbled in a machine to achieve the desired look, or 3cm tiles can be tumbled and then split, creating two tiles that are tumbled on one side.

Marble and limestone are your primary candidates for a tumbled finish.

Brushed features a worn-down look achieved by brushing the surface of the stone, simulating natural wear over time.
The natural stone family has many styles and personalities.
Hopefully we’ve provided you with enough knowledge to be a smarter shopper by understanding and appreciating their natural and beautiful differences.

Know this information before installation day.

Think of it this way: the earth has been preparing your natural stone for millions of years. Doesn’t it make sense that you prepare your home for the flooring before it arrives? Of course it does, and that’s why we’ve prepared this section for you. Being prepared and involved beforehand will help insure that the process is done smoothly and efficiently, and, hopefully, eliminate expressions of “If only I had checked on…”
Below are the key things you should know about before installation day.

Tip #1: few of us are naturals at installing natural stone flooring.

Installing this type of floor is heavy, difficult work, labor intensive and extremely exacting. It’s simply not for the weekend do-it-yourselfer.

We strongly recommend you call upon a reliable, seasoned, dedicated professional to install your natural stone floor. Ask us for help in this matter.

That way you can be assured of a beautiful, efficient and correct installation.

However, while installing natural stone flooring is a skill that is developed through years of experience, your understanding of the basics of installation will increase your knowledge of the process, and enhance your confidence in the professionals working in your home.

As with most flooring products, the first step is to prepare the substrate, the surface on which the stone tile will be laid. Using professional installers will insure that the correct materials and methods are employed.

With cement subfloors, installers can opt to apply the mortar directly to it and simply lay the tile.

Wood subfloors, however, usually require a CBU or cement backer unit for support and a moisture barrier.

It’s important to note that movement in the substrate material can sometimes occur. For example, water penetrating the grout and/or freezing and thawing temperatures can sometimes cause tile to rise, crack or chip.

To help prevent this, some installers will use a material called Ditra.

Ditra is an underlayment that provides a solid foundation for the tile, while still allowing for slight movement of the substrate without damage.

For example, in the event that water penetrates the grout in a bathroom, it provides a protective waterproof barrier.

Your floor will now come to life.
The installer will measure the area and snap chalk lines for an accurate layout, then determine which pieces of tile will need to be cut to fit the area.

Tiles that need to be cut are measured and marked with a pencil.

The installer then uses a wet saw with a 10-inch diamond blade to cut through the stone tile.

The freshly cut edges are smoothed by hand with a white stone.

Once the layout has been determined, the installer can begin setting the tile.

Your beautiful new floor is about to be born.

Thinset mortar, which is a cement based adhesive, is applied to the surface with a notched or grooved trowel.

The tile is then placed into the thinset and pressed firmly into place.

Wedge or butter? Know the difference.
Stone tile is typically installed with narrow grout joints, meaning the tiles are laid very close to each other on all sides.

If it is a large tiled area, installers may use plastic tile wedges or spacers to maintain consistent spacing between each tile. In small areas they may not use these at all.

The installer may back butter the back of the tile with thinset mortar which will strengthen the bond between the tile and mortar already laid on the substrate.

As the installers move along setting the tile, they continually check to make sure the newly tiled area is as level as possible.

Since stone tiles vary in thickness and size, the amount of thinset mortar applied is adjusted where needed.

After all the tiles are set and the thinset mortar has fully cured, the installer fills the joints between the tiles with grout.

Un-sanded grout is most commonly used in natural stone installations.

This type of grout is used because it is able to fill the small joints more easily and will not scratch soft stones like sanded grout might. Your installers think of everything.

Un-sanded grout is a dry, Portland cement-based product that is mixed with water onsite.

The grout mixture is spread over the tiled area with a grout float to fill in all the joints.

A sponge is then used to remove excess grout from the surface of the tile, while leaving the grout in the joints to cure.

And that is how your beautiful natural stone floor is professionally installed.

What to know and do before installation day Deal first with your furniture

Remove all furniture and other objects and materials from the areas where the installation will take place. Some installers will move your furniture, but there may be an additional charge for doing so.

Before moving, you’ll also need to empty the contents of china cabinets, closets and the like.

Be aware that the area of installation must be climate controlled (heated or air conditioned). Indoor humidity should be maintained between 45-65%.

Now address your old floor covering.
Please consider how your old floor covering will be taken up and disposed of. This can be a time consuming task. We recommend that you check with us about the cost and the method of disposal.

If you prefer to remove your present floor covering, do it at least one day prior to arrival of your natural stone product to allow for cleanup and floor preparation. If removing old carpet, please leave tack strips in place and pull the staples out of the floor from the original pad.

What will you do about your trim?
In many cases, moldings and baseboards need to be removed for natural stone installation. Your installer may do this but at an additional charge and they will probably not be responsible for damage or breakage due to dry or brittle wood.

Painted baseboards, woodwork and paint may need retouching after the installation is complete. If necessary, this is your responsibility.

Next, address the subflooring.
Your existing subfloor may need to be prepared to receive the natural stone, or a new subfloor may be required. We suggest you discuss this with us and, if subfloor work is necessary, that it be done by qualified professionals. It is important that the subfloor be as clean and level as possible.

Ensure that the doors swing free.
When natural stone is installed, there’s always the possibility that the doors, especially closet doors, basement and bedroom doors, may not clear the new natural stone and swing free.

Some installers will remove doors in order to install the natural stone and re-hang them if possible. They probably won’t shave or cut down doors to insure clearance. You should check with us as to their policy and the cost. You may need to arrange for a qualified carpenter to provide this service after the installation of your new natural stone floor.

Stay on top of the clean-up.
Installing new natural stone will produce waste. Usually these materials are collected by your installer and left at your trash collection site.

Check with us before the day of installation so you’re clear about the clean up, if there are added costs to do so, and ask about the plan for natural stone remnants.

What to know and do during installation day

Home is the only place to be.
Be prepared to be at home the day of installation and be available in case the installation crew has questions.

Your presence will insure that the correct natural stone is installed in the right areas.

Because it is difficult to estimate the length and circumstances of each job, some installers may not be able to give you an exact time of arrival. We suggest you be flexible and keep in touch with us.

The best laid floors are laid safely.
Your installers will use a variety of tools and techniques that can make the work area hazardous. Please make sure that children and pets are kept out of the work area on installation day.

Walk-thru and talk it through.
We recommend that, prior to the completion of the installation, you walk thru the job with the chief installer. This will give you the opportunity to ask questions and be clear on any final details.

What to know and do after installation day
Breathe free and easy.
If you are sensitive to dust and odors, good ventilation should be established for 48 to 72 hours after installation.

When it comes to installation day be prepared.
Know what to do, when and how. Understand the needs of the installers and the installation process and your natural stone installation will run smoothly and you will be left with a beautiful product to enjoy for years to come.